| This is a guide on the subject of Act progression. Last updated on June 5, 2021. |
The Acts quick guide helps players complete the Acts in the the fastest and most efficient manner. It is designed for experienced players who have completed the Acts at least once and are aware of the game mechanics. Therefore we do not cover basic gameplay aspects in this guide.
This guide includes:
- All Book of Skill Quests
- All Trials
- All minor and major Gods (to fully unlock The Pantheon)
- Kills all Bandits (optional, you can save the bandit of your choice as per your build guide)
This guide does not include:
- All Book of Regrets Quests, because regret points can be easily obtained through
 Orb of RegretOrb of RegretStack Size: 40Grants a passive skill refund pointRight click on this item to use it.
Shift click to unstack. s.
s.
Leveling Gear[]
Tip: For fastest progression through the Acts, prioritize obtaining a ![]() Quicksilver Flask of AdrenalineQuicksilver FlaskLasts 6.00 Seconds
Quicksilver Flask of AdrenalineQuicksilver FlaskLasts 6.00 Seconds
Consumes 30 of 60 Charges on use
40% increased Movement SpeedRight click to drink. Can only hold charges while in belt. Refills as you kill monsters.![]() and any Boots with +30 Increased Movement Speed (or a lower value).
and any Boots with +30 Increased Movement Speed (or a lower value).
Unique items[]
The following gear is helpful while leveling during the Acts, as they are cheap Unique items that provide significant boosts, and can be worn from a low level onwards. These are not necessarily required, and players with no currency can simply use the gear that drops during the Acts, and linked gear purchased from town vendors.
| Slot | Builds | Item | Benefits | |
|---|---|---|---|---|
| Helmet | All | Leather CapQuality: +20% Evasion: (58-82)+(30-50) to Evasion Rating 10% increased Rarity of Items found +(30-40)% to all Elemental Resistances Reflects 4 Physical Damage to Melee Attackers Level Requirement reduced by 100 (Hidden)No metal slips as easily through the fingers as gold. |
Elemental resistances | |
| Body | All | Simple RobeQuality: +20% Movement Speed: -3%Item has no level requirement and Energy Shield (Hidden) Item has 6 White Sockets and is fully linked (Hidden) |
Ability to 6-link your main attack ability | |
| Gloves | All | Iron GauntletsQuality: +20% Armour: 7(10-15)% increased Attack Speed (10-15)% increased Cast Speed +(20-30) to maximum Life (15-10)% reduced maximum Mana 10% chance to gain a Power, Frenzy or Endurance Charge on Kill ConduitWhy cling to your sanity? It offers you nothing. Surrender to me, and I will grant you everything. |
More damage and and charge generation | |
| Boots | All | Wool ShoesQuality: +20% Energy Shield: (16-28)+5 to Dexterity +(10-20) to maximum Energy Shield (20-40)% increased Mana Regeneration Rate 20% increased Movement Speed Cannot be FrozenAll the world is my home. Strapped BootsQuality: +20% Evasion: (72-96) Energy Shield: (25-43)Requires Level 16, 18 Dex, 18 Int+(20-30) to Dexterity +(30-50) to Evasion Rating +(15-30) to maximum Energy Shield +20% to Cold Resistance 20% increased Movement Speed 15% increased Damage taken while on Full Energy Shield 20% increased Movement Speed while on Full Energy ShieldIt takes a clear mind to outrun a storm. Scholar BootsQuality: +20% Energy Shield: (46-54)Requires Level 32, 59 Int+10 to Dexterity +(20-30) to Intelligence (100-140)% increased Energy Shield (10-15)% increased Stun and Block Recovery 15% increased Movement Speed 20% increased Movement Speed when on Full LifeShavronne raced to Brutus' side, her last hope against the Karui tide. Goathide BootsQuality: +20% Evasion: (92-113)Requires Level 12, 26 Dex+15 to Dexterity +15 to Intelligence (100-150)% increased Evasion Rating 15% increased Movement Speed (5-10)% of Damage taken gained as Mana over 4 seconds when Hit 10% increased Movement Speed for you and nearby AlliesAlive but not unscathed, Victario fled as slaughter blossomed at the gates. |
Faster movement | |
| Belt | Melee/Ranger | Heavy BeltRequires Level 8+(25-35) to Strength+25 to Strength Adds 5 to 15 Physical Damage to Attacks 10% increased maximum Life +(10-20)% to Cold Resistance 25% increased Flask Life Recovery rateKaom's strength was rivaled only by the great Meginord of the north. Cloth BeltRequires Level 16(15-25)% increased Stun and Block Recovery+(20-30) to all Attributes (6-8)% increased Quantity of Items found +20% to Fire Resistance 20% increased Flask Effect Duration -2 Physical Damage taken from Attack HitsA large enough debt turns even a friend into an enemy, and the Perandus family had more debtors than anyone. Heavy BeltRequires Level 20+(25-35) to Strength(15-25)% increased Global Physical Damage You take 30% reduced Extra Damage from Critical Strikes +(30-40) to maximum Life +(10-15)% to all Elemental Resistances Nearby Enemies are IntimidatedIn battle, virtue matters not. Only victory. Leather BeltRequires Level 8+(25-40) to maximum Life+(20-30) to Strength +(20-30) to Intelligence +(10-20)% to Cold Resistance 0.4% of Physical Attack Damage Leeched as Life 0.4% of Physical Attack Damage Leeched as ManaThey say a lifetime of wisdom is carried in every skin the great beasts shed. |
More damage and elemental resistances | |
| Spellcaster | Cloth BeltRequires Level 16(15-25)% increased Stun and Block Recovery+(20-30) to all Attributes (6-8)% increased Quantity of Items found +20% to Fire Resistance 20% increased Flask Effect Duration -2 Physical Damage taken from Attack HitsA large enough debt turns even a friend into an enemy, and the Perandus family had more debtors than anyone. |
Easier leveling | ||
| Rings | All | 2 Paua RingRequires Level 22+(20-30) to maximum Mana+(30-60) to maximum Mana Regenerate (3-6) Mana per second -(8-4) to Total Mana Cost of Skills 8% of Damage taken gained as Mana over 4 seconds when HitThe Thaumaturgical masters of the Eternal Empire, as unpredictable and varied as they were, all understood one thing: Free thinking leads to free action. Paua Ring+(20-30) to maximum Mana+(25-30) to maximum Mana (45-65)% increased Mana Regeneration Rate 2% increased Experience gain 2% increased Intelligence for each Unique Item Equipped 3% additional chance for Slain monsters to drop Scrolls of Wisdom"Our warehouses are bursting. Our vaults are full. But our minds are still hungry." - Medici Perandus, Prefect to the Treasury Coral Ring+(20-30) to maximum Life+(10-20) to Strength +(2-4) Life gained for each Enemy hit by your Attacks +1 to Maximum Endurance ChargesA token from the sea A sign for Kaom to lead his Karui to Wraeclast. Iron RingAdds 1 to 4 Physical Damage to Attacks5% increased Global Physical Damage Adds 1 to 3 Chaos Damage to Attacks +(20-30) to maximum Life Regenerate (2-4) Life per second 10% chance to Cause Monsters to FleeFear is highly infectious. |
Reduced mana cost of skills / Increased XP gain | |
| Amulet | Melee/Ranger | Jade AmuletRequires Level 5+(20-30) to Dexterity+(20-30) to Strength +100 to Accuracy Rating 30% increased Projectile Speed 10% increased Movement Speed 30% increased Projectile Damage"Shoot first, ask no questions." - Karui wisdom |
More damage, faster attacks | |
| Spellcaster | Paua AmuletRequires Level 16(20-30)% increased Mana Regeneration Rate+100 to maximum Mana (16-24)% increased maximum Mana (80-100)% increased Mana Regeneration Rate Items and Gems have 25% reduced Attribute RequirementsThe world is but a piece of parchment, blank and symmetric. We label each side: one Good, one Evil; one Black, one White. The divine truth, however, is that both are one and the same. -Jaetai, Vaal Advisor |
More mana, improved mana regeneration | ||
| Weapons | Melee | 2 Jade HatchetOne Handed Axe Quality: +20% Physical Damage: (24-30) to (48-54) Critical Strike Chance: 5.00% Attacks per Second: 1.45 Weapon Range: 11Requires Level 6, 21 StrSocketed Gems are supported by Level 2 Chance to Flee Adds (10-15) to (25-30) Physical Damage +(10-15) to maximum Life +(5-7) Life gained on Kill 10% increased Movement SpeedThe eagle knows nothing but the scream and the strike. CleaverOne Handed Axe Quality: +20% Physical Damage: (20.4-32.4) to (66-72) Elemental Damage: (5-15) to (20-25) Critical Strike Chance: 5.00% Attacks per Second: (1.39-1.43) Weapon Range: 11Requires Level 16, 48 StrAdds (5-15) to (20-25) Physical Damage Adds (5-15) to (20-25) Fire Damage (7-10)% increased Attack Speed +(15-25)% to Fire Resistance 5% increased Movement Speed Curse Enemies with Flammability on Hit, with 40% increased EffectThe fastest way to a man's heart is through his sternum. WoodsplitterTwo Handed Axe Quality: +20% Physical Damage: (48-52.8) to (98-107.8) Critical Strike Chance: 5.00% Attacks per Second: 1.30 Weapon Range: 13Requires Level 13, 36 Str, 17 Dex+1 to Level of Socketed Strength Gems Trigger Level 1 Gore Shockwave on Melee Hit if you have at least 150 Strength +(15-30) to Strength (80-100)% increased Physical Damage Adds 5 to 10 Physical Damage Culling StrikeSwinging through the air, it sings of sundered, severed, missing things. SabreOne Handed Sword Quality: +20% Physical Damage: (11.2-15.3) to (37.8-51) Critical Strike Chance: 5.00% Attacks per Second: 1.78 Weapon Range: 11Requires Level 10, 18 Str, 26 Dex40% increased Global Accuracy Rating(20-50)% increased Physical Damage Adds (3-4) to (5-8) Physical Damage 15% increased Attack Speed Gain (25-30)% of Physical Damage as Extra Cold Damage 10% increased Damage taken from Skeletons 10% increased Damage taken from Ghosts"She's pretty, aye. So pretty you'll want to be with her long after you're dead." |
High damage output with low level requirement | |
| Ranger | Crude BowBow Quality: +20% Physical Damage: (10-11) to (26-28.6) Critical Strike Chance: 5.00% Attacks per Second: 1.54 Weapon Range: 120+1 to Level of Socketed Bow Gems (80-100)% increased Physical Damage 10% increased Attack Speed +10 Mana gained on Kill +30 to Accuracy Rating"The wild takes care of its own." - Hyrri of the Karui Recurve BowBow Quality: +20% Physical Damage: (19.8-22) to (61.2-68) Critical Strike Chance: 6.70% Attacks per Second: (1.30-1.35) Weapon Range: 120Requires Level 18, 65 Dex+(15-25)% to Global Critical Strike Multiplier(60-80)% increased Physical Damage (4-8)% increased Attack Speed Skills Chain +1 times 30% increased Projectile Speed (20-40)% increased Elemental Damage with Attack Skills"Exiled to the sea; what a joke. I'm more free than I've ever been." - Captain Weylam "Rot-tooth" Roth of the Black Crest Two-Point Arrow QuiverRequires Level 10(20-30)% increased Global Accuracy RatingGrants Level 5 Frostbite Skill (8-12)% increased Attack Speed +(30-40)% to Cold Resistance (30-40)% increased Chill Duration on Enemies Gain 20% of Physical Damage as Extra Cold Damage (7-10)% chance to Freeze Hexes on Slain Enemies are transferred to a nearby EnemyMist of breath Icing to lips and throat As the warm ones choke and fall Upon the frozen wasteland. Sharktooth Arrow QuiverRequires Level 10+(3-4) Life gained for each Enemy hit by your Attacks+(15-25) to Strength +(35-45) to Dexterity +(15-25) to Intelligence Adds 10 to 20 Cold Damage to Attacks (7-10)% increased Attack Speed +(2-3) Life gained for each Enemy hit by your Attacks 10% increased Area of EffectA Karui woman's place was not the battlefield, but the hearth. Hyrri changed all of that. | |||
| Spellcaster | 2 Driftwood WandWand Quality: +20% Physical Damage: 6-10.8 Critical Strike Chance: 7.00% Attacks per Second: 1.40 Weapon Range: 120(8-12)% increased Spell Damage+1 to Level of Socketed Spell Gems (20-28)% increased Spell Damage (5-8)% increased Cast Speed +(15-20) to maximum Life +(15-20) to maximum Mana Regenerate (6-8) Life over 1 second when you Cast a SpellFrom the smallest seeds To the tallest redwoods, Life endures in Wraeclast. Bronze SceptreSceptre Quality: +20% Physical Damage: 12-22.8 Critical Strike Chance: 6.00% Attacks per Second: 1.40 Weapon Range: 11Requires Level 10, 22 Str, 22 Int12% increased Elemental DamageAdds (2-3) to (5-6) Fire Damage to Spells Adds (2-3) to (5-6) Cold Damage to Spells Adds 1 to (10-12) Lightning Damage to Spells (4-6)% increased Cast Speed (100-140)% increased Critical Strike Chance for SpellsThe worst of Axiom were imprisoned by more than iron. Gnarled BranchStaff Quality: +20% Physical Damage: 10.8-22.8 Critical Strike Chance: 6.00% Attacks per Second: 1.30 Weapon Range: 13+18% Chance to Block Attack Damage while wielding a StaffSocketed Gems are Supported by Level 8 Trap (40-50)% increased Global Damage (10-20)% increased maximum Life (10-20)% increased maximum ManaYou've no reason for fear when you're a root in a fen - Old Ezomyte saying. | |||
| Poison | 2 Skinning KnifeDagger Quality: +20% Physical Damage: (8.5-11.4) to (34-41.8) Critical Strike Chance: 7.80% Attacks per Second: 1.45 Weapon Range: 10Requires Level 5, 16 Dex30% increased Global Critical Strike Chance+(10-15) to Dexterity (50-70)% increased Physical Damage Adds (1-2) to (3-5) Physical Damage 30% increased Critical Strike Chance 40% increased Attack Damage against Bleeding Enemies 50% chance to cause Bleeding on Critical StrikeA tap on the shoulder A peck on the cheek A sip of your wine So red and so sleek StilettoDagger Quality: +20% Physical Damage: (14-20.8) to (50.4-64) Critical Strike Chance: 6.10% Attacks per Second: 1.65 Weapon Range: 10Requires Level 15, 30 Dex, 30 Int30% increased Global Critical Strike Chance+20 to Dexterity (20-40)% increased Physical Damage Adds (3-6) to (9-13) Physical Damage 10% increased Attack Speed 30% chance to cause Bleeding on Hit Extra gore"I'm a painter, and crimson is my chosen hue." - Coralito, Brotherhood of Silence | |||
Self-crafted items[]
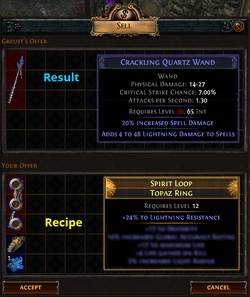
Vendor recipe that produces a wand with Lightning Spell Damage
Players can use vendor recipes to easily craft weapons that are required for leveling, if they have no currency to purchase items, or if they are playing in SSF mode (solo self-found).
To do this, simply sell the items in the "Recipe" column to any vendor at any town, in order to receive the item in the "Result" column.
| Item | Recipe | Result |
|---|---|---|
|
Magic Boots with 10% increased Movement Speed | |
|
Magic Boots with (X+5)% increased Movement Speed | |
|
Magic Weapon with | |
|
Magic Weapon with | |
|
Magic Weapon with | |
|
Magic Weapon with | |
|
Magic Weapon with | |
|
Magic Weapon with | |
|
Magic Weapon with |
Terminology[]
- "WP" means Waypoint - use a Waypoint at a town to quickly navigate to the location
- "TP" means Teleport - use a Portal Scroll, the Portal skill or exit to character select to teleport straight to the last town you have been in
Act 1[]
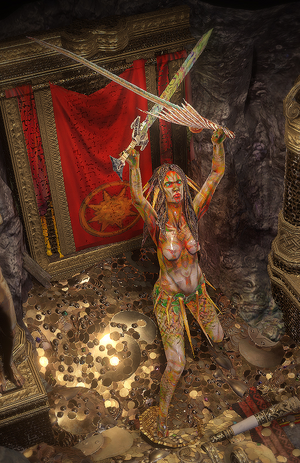
Merveil, the Siren, the final boss of Act I
- Twilight Strand - Kill Hillock - Go to Town
- Town - Talk to NPCs - Go to Coast
- Coast - Tag WP - Go to Tidal Island
- Tidal Island - (Kill Hailrake for
 Quicksilver FlaskQuicksilver FlaskLasts 6.00 Seconds
Consumes 30 of 60 Charges on use
40% increased Movement SpeedRight click to drink. Can only hold charges while in belt. Refills as you kill monsters. Reward - TP to town and claim reward) - WP/Go to Coast
 - Coast - Go to Mud Flats
- Mud Flats - Get
 Roseus GlyphRoseus GlyphIts pleasing sheen remains even in shadow,
as if it were somehow lit from within. ,
,  Ammonite GlyphAmmonite GlyphWhen put to the ear it whispers not of
the sea, but long dead incantations. and
and  Haliotis GlyphHaliotis GlyphIts corrugated surface brings a strange tingle
to the fingertips. This is no mere decoration. from Rhoa Nests - Activate Strange Glyph Wall - Go to Submerged Passage
 - Submerged Passage - Tag WP - Go to Flooded Depths
- The Flooded Depths - Kill Dweller of the Deep - TP to town
- Town - Talk to NPCs - WP to Submerged Passage
- Submerged Passage - Go to Ledge
- Ledge - Tag WP - Go to Climb
- The Climb - Tag WP - Go to Lower Prison
- Lower Prison - Once per league:Complete Trial - Go to Upper Prison
- Upper Prison - Go to Warden's Quarters
- Warden's Quarters - Follow Blood - Kill Brutus - Go to Warden's Chambers
- Warden's Chambers - Go to Prisoner's Gate
- Prisoner's Gate - Tag WP - Go to Town
- Town - Talk to NPCs - WP to Prisoner's Gate
- Prisoner's Gate - Go to Ship Graveyard
- Ship Graveyard - Tag WP - Go to Ship Graveyard Cave
- Ship Graveyard Cave - Pick up
 AllflameAllflameDistilled from naked ambition and unfettered obsession,
the Allflame emanates a silvern warmth like no other,
and engulfs those moths fool enough to embrace it. - Exit Cave
 - Ship Graveyard - Kill Fairgraves - TP to Town
- Town - Talk to NPCs - WP to Ship Graveyard
- Ship Graveyard - Go to Cavern of Wrath
- Cavern of Wrath - Tag WP - Go to Cavern of Anger
- Cavern of Anger - Go to Merveil's Lair
- Merveil's Lair - Kill Merveil and Merveil, the Twisted - Go to Act II
Act 2[]
The Vaal Oversoul, the final boss of Act II
- Southern Forest - Go to Town
- Town - Go to Old Fields (top-right exit from town)
- Old Fields - (Enter the Den and kill the Great White Beast for Quicksilver Reward) - Go to Crossroads
- Crossroads - Tag WP (follow road) - Go up/left to Chamber of Sins
- Chamber of Sins Level 1 - Tag WP (center) - Go to Chamber of Sins Level 2 (direction of WP)
- Chamber of Sins Level 2 - Once per league:Solve Trial - Kill Fidelitas - Take
 Baleful GemBaleful GemThe withering glare of corruption, made
corporeal and pellucid in crystal. - TP to Town
 - Town - Talk to NPCs (for Heralds) - WP to Crossroads
- Crossroads - Go up/right to Broken Bridge
- Broken Bridge - Tag WP (follow road) - Kill Kraityn - Take
 Kraityn's AmuletKraityn's AmuletWhile this artefact resonates with power,
it is simply a piece in a larger puzzle. - TP to town
 - Once per league:Town - WP to Crossroads - Go to Fellshrine Ruins (right/down) - Go to The Crypt Level 1 - Solve Trial - TP to Town
- Town - Go to Riverways (bottom-left exit from town)
- Riverways - Tag WP (follow broken road) - Go to Western Forest (down)
- Western Forest - Tag WP (follow road) - Kill or Save Alira (left/top from WP) - (Take
 Alira's AmuletAlira's AmuletSegregated by treachery, this artefact
longs to be reunited with her sisters. if you killed her)
 - Western Forest - Kill Captain Arteri (end of road) - Take
 Thaumetic EmblemThaumetic EmblemA sigil of thaumaturgy graven in granite.
 - Open Thaumetic Seal - Go to Weaver's Chamber (other side than Alira)
 - The Weaver's Chambers - Go to Weaver's Nest
- Weaver's Nest - Kill Weaver - Take
 Maligaro's SpikeMaligaro's SpikeMaligaro loved his tools, and took great
pains to keep them excruciatingly sharp. - TP to Town
 - Town - Talk to NPCs - WP to Act I town (Lioneye’s Watch) - Talk to Bestel for skill point - WP to Riverways
- Riverways - Go to Wetlands (up/left)
- Wetlands - Kill Oak (middle) - Take
 Oak's AmuletOak's AmuletA relic of a sundered relationship,
it awaits reconciliation with its kin. - Remove Tree Roots - Go to Vaal Ruins
 - Vaal Ruins - Activate Ancient Seal - Go to Northern Forest
- Northern Forest - Tag WP (top) - TP to Town - Talk to Eremir or Alira for
 The ApexThe ApexThough its power has been shared, there
is still more the Apex might unlock. - WP to Northern Forest - Go to Caverns (top)
 - Caverns - Tag WP - Go to Ancient Pyramid
- Ancient Pyramid - Go to Pyramid Apex
- The Apex - Activate Dark Altar - Kill Vaal Oversoul - Go to Act III
Act 3[]
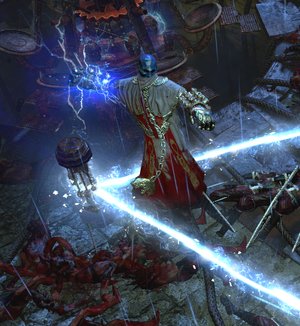
Dominus, High Templar, the final boss of Act III
- The City of Sarn - Tag WP - Kill Guard Captain - Talk to Clarissa - Go to Town
- Town - Go to Slums
- Slums - Go to Crematorium
- Crematorium - Tag WP - Once per league:Solve Trial - Kill Piety - Get
 Tolman's BraceletTolman's BraceletA craftswoman's ode to
fresh hope, a new love. - TP to Town
 - Town - Get
 Sewer KeysSewer KeysTo enter a city's bowels is to be
privy to its best-kept secrets. from Clarissa - Go to Slums
 - Slums - Open Sewer Grating (top) - Go to Sewers
- The Sewers - Take
 Bust of Gaius SentariBust of Gaius SentariThe Emperor honours Gaius Sentari as Supreme Servant.
"A man's thoughts are his shackles. A man's thoughts are his wings." - Tag WP - Take
  Bust of Hector TituciusBust of Hector TituciusThe Emperor honours Hector Titucius as Supreme Servant.
"Strength in purpose is strength in deed." and
and  Bust of Marceus LioneyeBust of Marceus LioneyeThe Emperor honours Marceus Lioneye as Supreme Servant.
"The road to Glory is paved with Sacrifice." - Go to Marketplace (top)
 - Marketplace - Tag WP - Once per league:Go to Catacombs (near WP) - Solve Trial - TP to Town
- Town - Talk to NPCs - WP to Marketplace - Go to Battlefront (up/left)
- Battlefront - Tag WP - Kill Aurelianus - Take
 Ribbon SpoolRibbon SpoolMachinery makes the minions.
Minions make the master. - Go to Docks (left)
 - Docks - Tag WP (near Fairgraves) - Take
 Thaumetic SulphiteThaumetic SulphiteEssence of pure thaumaturgy.
Apply with trepidation. (near WP) - TP to Town - WP to Battlefront
 - Battlefront - Go to Solaris Temple (up)
- Solaris Temple Level 1 - Tag WP - Go to Solaris Temple Level 2
- Solaris Temple Level 2 - Tag WP - Talk to Dialla for
 Infernal TalcInfernal Talc"A Virtue Gem is a raging thunderstorm imprisoned within a single raindrop.
Infernal Talc simply lets the storm out." - Malachai the Soulless - WP to Sewers
 - Sewers - Open Undying Blockage - Go to Ebony Barracks
- Ebony Barracks - Tag WP - Kill General Gravicius (up) - Go to Lunaris Temple (up)
- Lunaris Temple Level 1 - Tag WP - Go to Lunaris Temple Level 2
- Lunaris Temple Level 2 - Kill Piety - Take
 Tower KeyTower KeyGod will only offer the door.
Man must choose whether to open it. - TP to Town
 - Town - Talk to NPCs - WP to Ebony Barracks
- Ebony Barracks - Go to Imperial Gardens (right/top right)
- Imperial Gardens - Tag WP - Once per league:Solve Trial (top) - Open Locked Room (top/right) - Go to Sceptre of God
- Sceptre of God - Tag WP - Go to Upper Sceptre of God
- Upper Sceptre of God - Go to Tower Rooftop
- Tower Rooftop - Kill Dominus and Dominus, Ascendant - Go to Act IV
All Skill Gems[]
If players require skill gems for their build, they can purchase it from Siosa at The Library:
- TP to Imperial Gardens - Go to Library (top-left)
- The Library - Tag WP (near Siosa) - Talk to Siosa - Activate Loose Candle (top-left/bottom-left of area) - Go to Archives
- The Archives - Find 4 Golden Pages - Go to Library
- Library - Talk to Siosa - Purchase Skill Gems
- If certain skill gems are unavailable at Siosa, then players must wait for Act 7 after which Lilly Roth offers all gems in the game
Act 4[]
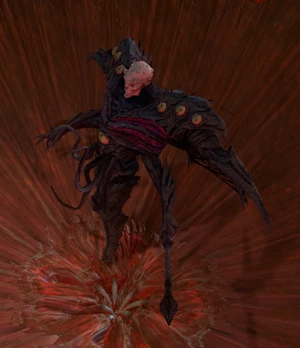
Malachai, The Nightmare, the final boss of Act IV
- Aqueduct - Go to Town
- Town - Go to Dried Lake (bottom-left exit of Town)
- Dried Lake - Kill Voll - Take
 Deshret's BannerDeshret's BannerWhen the sun sets, the plains should be red.
 - TP to Town
 - Town - Open Deshret's Seal (near Niko) - Go to Mines
- The Mines Level 1 - Go to Mines Level 2
- The Mines Level 2 - Tag Deshret's Spirit - Go to Crystal Veins
- Crystal Veins - Tag WP - Go to Kaom's Dream
- Kaom's Dream - Go to Kaom's Stronghold
- Kaom's Stronghold - Tag WP - Kill King Kaom - Take
 The Eye of FuryThe Eye of Fury"Fear becomes Hatred.
Hatred becomes Fury.
Thus is Man transformed
from Martyr to Maker."
- Malachai - TP to Town - WP to Crystal Veins
 - Crystal Veins - Talk to Dialla - Go to Daresso's Dream
- Daresso's Dream - Kill Barkhul - Go to Grand Arena
- Grand Arena - Tag WP - Kill Unique Trio - Go to Ring of Blades - Kill Daresso - Take
 The Eye of DesireThe Eye of Desire"It is a cruel joke that
Man was born with more
Intent than Life."
- Malachai - TP to Town
 - Town - Talk to NPCs - WP to Crystal Veins
- Crystal Veins - Talk to Dialla - Go to Belly of the Beast
- The Belly of the Beast Level 1 - Go to Belly of the Beast Level 2
- The Belly of the Beast Level 2 - Kill Piety - Go to Harvest
- Harvest - Tag WP - Talk to Piety - Click Black Core - Run to the 3 Arenas:
- Kill Shavronne - Take
 Malachai's EntrailsMalachai's EntrailsMy organs tether me to mortality
like a chain. This chain holds me
from my true potential.
- Kill Maligaro - Take
 Malachai's HeartMalachai's HeartMy heart forces blood through my veins.
But one who may bleed may die, and
death is no fitting end to genius.
- Kill Doedre - Take
 Malachai's LungsMalachai's LungsMy lungs breathe the same air as
the foolish and the weak. May I be
yet another step removed from them.
- Kill Shavronne - Take
- Harvest - Talk to Piety - Go to Black Core - Kill Piety and Malachai - Go to Black Heart
- Black Heart - Kill Malachai and all 3 Heart of the Beast - TP to Town
- Town - Talk to NPCs - Go to Ascent
- The Ascent - Walk to the summit - Activate Lever - Go to Act V
Act 5[]
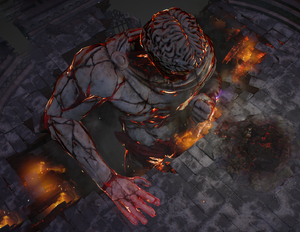
Kitava, the Insatiable, the final boss of Act V
- The Slave Pens - Tag WP - Kill Overseer Krow - Go to Town
- Town - Talk to NPCs - Go to Control Blocks
- Control Blocks - Pick up
 MiasmeterMiasmeter"We shall peer at these cosmic wonderments as they
wake and writhe within that deep and nameless dark."
- Vilenta, 'Miasmeter: A Thesis' (down/left) - Kill Justicar Casticus (top/right) - Take
  Eyes of ZealEyes of ZealEyes blazing with holy flame, the Pilgrim saw
a great palace descend from the burgeoning sky,
its gates barred against the unfaithful. - Go to Oriath Square
 - Oriath Square - Tag WP - Open Templar Courts Entrance (top right) - Go to Templar Courts
- The Templar Courts - Tag WP - Go to Chamber of Innocence
- The Chamber of Innocence - Tag WP - Go to Sanctum of Innocence (go leftmost, then right)
- The Sanctum of Innocence - Kill High Templar Avarius and Innocence - Go to Chamber of Innocence
- Chamber of Innocence - Go to Torched Courts
- Torched Courts - Go to Ruined Square
- Ruined Square - Tag WP (top left) - Go to Ossuary (near WP)
- Ossuary - Pick up
 Sign of PuritySign of PurityWrought from blood and gold, Innocence fashioned a weapon of tempered purity,
capable of banishing darkness, and bringing order to the chaos in men's hearts. - TP to Town
 - Town - Talk to NPCs - WP to Ruined Square
- Ruined Square - Go to Reliquary (down)
- Reliquary - Tag WP - Collect
 Tukohama's ToothTukohama's Tooth"The belly cannot hunger for what the eyes cannot see."
- Karui Proverb ,
,  Hinekora's HairHinekora's Hair"What we steal in life we repay in death."
- Karui Proverb and
and  Valako's JawValako's Jaw"One day you eat the fish. One day you feed the fish."
- Karui Proverb (corners of zone) - TP to Town
 - Town - Talk to NPCs - WP to Ruined Square
- Ruined Square - Go to Cathedral Rooftop (left)
- Cathedral Rooftop - Go to Cathedral Apex
- Cathedral Apex - Activate Cradle of Purity - Kill Kitava and Kitava's Heart - Get teleported to Town
- Town - Sail to Act VI
Act 6[]
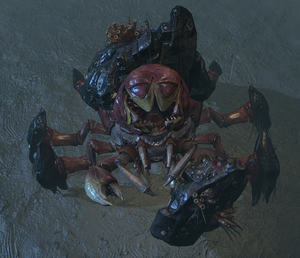
Tsoagoth, The Brine King, the final boss of Act VI
- Town - Go to Twilight Strand
- Twilight Strand - Kill all Monsters (for all skill gems from Lilly Roth) - TP to Town
- Town - Talk to NPCs - Go to Coast
- Coast - Tag WP - Go to Mudflats
- Mud Flats - Kill Dishonoured Queen - Take
 Eye of ConquestEye of Conquest"Weakness must be purged lest it
poison the blood of all Karui."
- Prayer to Tukohama - Go to Karui Fortress (top/left)
 - The Karui Fortress - Kill Tukohama (right) - Go to Ridge (outside of Arena and right)
- The Ridge - Tag WP - Go to Lower Prison
- Lower Prison - Tag WP - Once per league:Solve Trial - Go to Shavronne's Tower
- Shavronne's Tower - Go to Prison Rooftop
- Prison Rooftop - Kill Brutus and Shavronne - Go to Warden's Chambers
- Warden's Chambers - Go to Prisoner's Gate
- Prisoner's Gate - Tag WP - Go to Valley of the Fire Drinker
- Valley of the Fire Drinker - Kill Abberath - Go back to Prisoner's Gate
- Prisoner's Gate - Go to Western Forest
- Western Forest - Tag WP (follow road) - Go to Riverways (follow road)
- Riverways - Tag WP - Go to Wetlands (up/left)
- Wetlands - Go to Spawning Ground
- Spawning Ground - Destroy 3 Ryslatha's Nests - Kill Ryslatha - TP to Town
- Town - Talk to NPCs - WP to Riverways
- Riverways - Go to Southern Forest (follow road, then down/right)
- Southern Forest - Tag WP (end of area) - Go to Cavern of Anger (near WP)
- Cavern of Anger - Take
 The Black FlagThe Black Flag"May the lubbers feel fear in their
nethers, and may our blades follow."
- Rot-tooth's Rallying Cry - Go to Beacon
 - Beacon - Tag WP - Refuel the Beacon - Light the Beacon - Talk to Weylam Roth - Sail to Brine King's Reef
- The Brine King's Reef - Tag WP - Go to The Brine King's Throne - Kill Tsoagoth - Sail to Act VII
Act 7[]
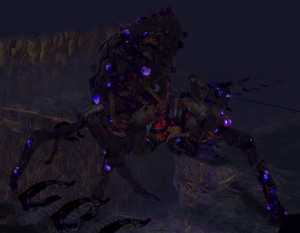
Arakaali, Spinner of Shadows, the final boss of Act VII
- Town - Go to Broken Bridge
- Broken Bridge - Go to Crossroads (follow road/left)
- Crossroads - Tag WP (follow road) - Go to Fellshrine Ruins (down/right)
- Fellshrine Ruins - Go to Crypt (follow road then right)
- The Crypt Level 1 - Tag WP - Once per league:Solve Trial - Open Sarcophagus - Go to Crypt Level 2
- The Crypt Level 2 - Take
 Maligaro's MapMaligaro's Map"Certain maps can only be rendered in the most vivid of viscera."
- Inquisitor Maligaro - TP to Town
 - Town - WP to Crossroads
- Crossroads - Go to Chamber of Sins (left)
- Chamber of Sins Level 1 - Tag WP (center) - Place Maligaro's Map into the Map Device - Start Map - Go to Maligaro's Sanctum
- Maligaro's Sanctum - Kill Maligaro, Black Death and Fidelitas - Take
 Black VenomBlack Venom"The spider is not defined by how
it lives, but by how it kills."
- Inquisitor Maligaro - TP to Chamber of Sins
 - Chamber of Sins Level 1 - Talk to Silk for
 Obsidian KeyObsidian Key"The cool blanket of shadows preserves our treasures."
- Inquisitor Maligaro - Go to Chamber of Sins Level 2 (direction of WP)
 - Chamber of Sins Level 2 - Once per league:Solve Trial - Open Secret Passage (top/right) - Go to Den
- Den - Tag WP - Go to Ashen Fields (top/right)
- The Ashen Fields - Tag WP - Go to Fortress Encampment (follow road to the left/down)
- The Fortress Encampment - Kill Greust - Go to Northern Forest
- Northern Forest - Tag WP - Go to Dread Thicket (left/down)
- Dread Thicket - Collect 7 Fireflies - Go to Den of Despair (center) - Kill Gruthkul - TP to Town
- Town - Talk to NPCs - WP to Northern Forest
- Northern Forest - Go to Causeway (top right/top left)
- The Causeway - Tag WP (end of area) - Take
 Kishara's StarKishara's StarTo the wily Kishara's eye, a star brighter than the sun.
 - Go to Vaal City
 - Vaal City - Tag WP (middle of zone) - Talk to Yeena - Go to The Temple of Decay Level 1
- The Temple of Decay Level 1 - Go to The Temple of Decay Level 2
- The Temple of Decay Level 2 - Kill Arakaali - Go to Act VIII
- TP to Act 7 Town - Talk to Weylam for reward
Act 8[]
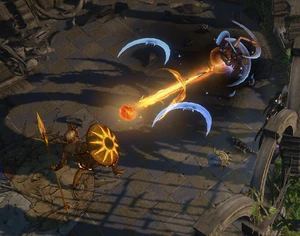
Solaris, Eternal Sun and Lunaris, Eternal Moon, the final bosses of Act VIII
- The Sarn Ramparts - Go to Sarn Encampment
- Sarn Encampment - Go to Toxic Conduits
- The Toxic Conduits - Open Loose Gate (end of area) - Go to Doedre's Cesspool
- Doedre's Cesspool - Go to Cauldron - Activate Valve - Kill Deodre - Tag WP - Go to Grand Promenade (down/left from WP)
- The Grand Promenade - Go to Bath House (follow right-hand fence)
- The Bath House - Tag WP - Kill Hector Titucius - Take
 Wings of VastiriWings of VastiriAnd mounting her mighty Roc, Garukhan, holy queen of the sky,
descended upon her enemies and their armies of darkness. - Once per league:Solve Trial (top or left) - Go to High Gardens (top or left)
 - High Gardens – Go to Pools of Terror (right) - Kill Yugul - TP to Town
- Town - Talk to NPCs - WP to Bath House
- Bath House - Go to Lunaris Concourse (right)
- The Lunaris Concourse - Tag WP - Go to Lunaris Temple (top)
- Lunaris Temple Level 1 – Tag WP - Go to Lunaris Temple Level 2
- Lunaris Temple Level 2 - Kill Dusk - Take
 Moon OrbMoon Orb"Moonlight is a wise mother. The moon which bathes us in soft,
cooling light, does so with the intent of illuminating our paths.
Moonlight is wisdom. Moonlight is life."
- The Lunar Verses - TP to Town
 - Town - Talk to NPCs - WP to Toxic Conduits
- Toxic Conduits - Go to Quay (up/right from WP)
- The Quay - Take
 Ankh of EternityAnkh of Eternity"The amulet, it... whispers to me. Horrible things..."
 (down) - Go to Resurrection Site (down/left) - Kill Tolman - Talk to Clarissa (nearby) – Go to Grain Gate (up/right)
 - The Grain Gate - Tag WP - Kill Gemling Legion - Go to Imperial Fields
- The Imperial Fields - Tag WP (follow road up) - Go to Solaris Temple (follow road then further up)
- Solaris Temple Level 1 - Tag WP - Go to Solaris Temple Level 2 (up from WP)
- Solaris Temple Level 2 - Kill Dawn - Take
 Sun OrbSun Orb"The sun is a devoted mother. She casts her golden blessings on
the crops of the pious and makes barren the fields of heresy.
Sunlight is belief. Sunlight is life."
- The Solar Verses - TP to Town
 - Town - Talk to NPCs - WP to Lunaris Concourse
- Lunaris Concourse - Go to Harbour Bridge (down/right)
- Harbour Bridge - Go to Sky Shrine (middle of bridge) - Activate Statue of the Sisters - Kill Lunaris and Solaris - Go to Act IX
Act 9[]
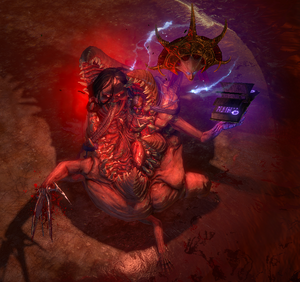
The Depraved Trinity, the final boss of Act IX
- The Blood Aqueduct - Tag WP - Go to Highgate
- Highgate - Go to Descent (top-right exit of Town)
- Descent - Go to Supply Hoist (twice) - Go to Vastiri Desert
- The Vastiri Desert - Tag WP - Open Storm-Weathered Chest - Kill Monsters - Pick up
 Storm BladeStorm BladeGarukhan sought madness and knowledge amongst the billowing clouds of a
blackened sky. A vulture of pride, she would not be refused, and so the
stratosphere divulged unto her eldritch secrets of its tumultuous past. - TP to Town
 - Town - Talk to NPCs for
 Bottled StormBottled Storm"One should not entice the storm; one cannot invite the storm, or give warrant
to its tyrant-soul. We survive only by appeasing the storm, with gifts and
offerings of adoration. We hope that, in its mercy, it shall pass us by."
- Tempestology of the Maraketh, Repudion IV - TP to Vastiri Dessert
 - Vastiri Dessert - Go to Oasis (up/right)
- Oasis - Go to The Sand Pit - Kill Shakari - TP to Town - WP to Vastiri Dessert
- Vastiri Dessert - Go to Foothills (up/left)
- The Foothills - Tag WP (up) - Go to Boiling Lake (up/right from WP)
- The Boiling Lake - Kill Basilisk - Take
 Basilisk AcidBasilisk AcidNobility once thought to capture the Basilisks and keep them as exotic pets.
This only served to fatten the vileness of their hearts, and with a hateful
acid that festered inside, the creatures became soured to their very bones. - TP to Town
 - Town - WP to Foothills
- Foothills - Go to Tunnel (top/left)
- Tunnel - Tag WP - Once per league:Solve Trial (before the WP) - Go to Quarry
- Quarry - Tag WP - Go to Shrine of the Winds (top right/top left) - Kill Garukhan and Kira - Take
 Sekhema FeatherSekhema Feather"And how shall we know a sekhema worthy of rule?
By the anointing of the Great Roc, under whose wings we grow and soar."
- Maraketh Coronation Ritual - Go to Refinery (top right/top left)
 - The Refinery - Kill General Adus - Take
 Trarthan PowderTrarthan Powder"Blow it all down! The emperor must have his gems, no matter the cost!"
 - TP to Town
 - Town - Talk to NPCs - WP to Quarry
- Quarry - Talk to Sin - Go to Belly of the Beast
- Belly of the Beast - Go to Rotting Core
- The Rotting Core - Go to Black Heart
- Black Heart - Enter the Portals and kill Deodre, Maligaro and Shavronne - Kill Depraved Trinity - Sail to Act X
Act 10[]
Warning: After you kill Kitava, you will have -60% to all resistances, making all combat harder if you don't have gear with sufficient resistances. Therefore you might want to level up at The Blood Aqueduct in Act 9, or The Ravaged Square in Act 10, till you reach around level 70, and then kill Kitava.
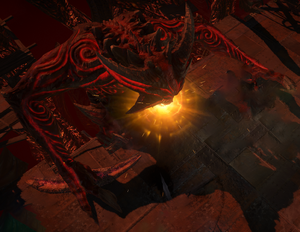
Kitava, the final boss of Act X
- Oriath Docks - Go to Cathedral Rooftop
- Cathedral Rooftop - Go to Cathedral Apex (left) - Kill Plaguewing - Talk to Bannon - Go to Ravaged Square (top/right)
- The Ravaged Square - Tag WP (right/up) - Go to Torched Courts (right from WP)
- Torched Courts - Go to Desecrated Chambers
- The Desecrated Chambers - Tag WP – Go to Sanctum of Innocence (go leftmost, then right)
- Sanctum of Innocence - Kill Avarius – Take
 The Staff of PurityThe Staff of Purity"Worry not for the heathens. They are devoid of soul.
Made vessels of wrath, they are damned by holy design."
- High Templar Avarius - TP to Town
 - Town - Talk to NPCs - WP to Ravaged Square
- Once per league:Ravaged Square - Go to Ossuary (next to WP) - Go to Bone Pits - Solve Trial - TP to Town - WP to Ravaged Square
- Ravaged Square - Go to Control Blocks (down)
- Control Blocks - Tag WP (left of entrance) - Kill Vilenta (follow right-hand wall) - TP to Town
- Town - Talk to NPCs - WP to Ravaged Square
- Ravaged Square - Talk to Innocence (right from WP) - Go to Canals
- The Canals - Go to Feeding Trough (follow canal)
- The Feeding Trough – Go to Altar of Hunger (top)
- Altar of Hunger - Kill Kitava - Go to Oriath - Talk to Lani for skill point
Next Steps[]
Once per league[]
These steps only need to be done with the first character you create in a league. It can be skipped for the second character onwards.
- Complete all the Trials of Ascendancy
- Oriath - Talk to NPCs - Go to Templar Laboratory (top right)
- The Templar Laboratory - Use Stairs - Wait till Map Device explodes - Talk to Officer Kirac - Exit to Oriath
- Oriath - Go to Fallen Courts (near lab entrance) - Go to The Fallen Courts (top right)
- The Fallen Courts - Take
 Vault KeyVault KeySome sins were never meant to be remembered...
 from Desk - TP to Oriath
 - Oriath - Go to Haunted Reliquary (bottom left) - Go to The Haunted Reliquary
- The Haunted Reliquary - Open both Vault Keys - Stand on Flower tile - Use Stairs - Talk to Kirac - TP to Hideout
- Hideout - Talk to Kirac - Add reward map in Map Device - Enter Map - Complete Map - Talk to Kirac to unlock Atlas
Once per character[]
These steps are required for every new character you create in a league.
- Ascend your character in The Lord's Labyrinth
- Complete your Pantheon by upgrading your chosen gods
Passive Skill Points[]
In order to ensure that you have all the skill points from the Act quests & sidequests, do the following:
- Open the game chat window
- Type '/passives' and press Enter
- The game will display a list of the quests that award passive skill points
- All of the quests must display '1' or higher
- If any of the quests display '0', then ensure you have completed the quest and collected the reward from the town NPC
Incomplete Quests[]
Follow this quick guide to finish up any incomplete quests that grant passive skillpoints. You only need to do this if any of these quests display a "0" before it.
- The Dweller of the Deep - WP to The Submerged Passage, Go to Flooded Depths, Kill The Dweller of the Deep in Act 1, and talk to Tarkleigh in Act 1 Town
- The Marooned Mariner - WP to The Ship Graveyard in Act 1, find the
 AllflameAllflameDistilled from naked ambition and unfettered obsession,
the Allflame emanates a silvern warmth like no other,
and engulfs those moths fool enough to embrace it. in the Cave, Talk to and Kill Fairgraves, then talk to Bestel in Act 1 Town
 - The Way Forward - TP to Western Forest in Act 2, Kill Captain Arteri (end of road), take
 Thaumetic EmblemThaumetic EmblemA sigil of thaumaturgy graven in granite.
 and click Thaumetic Seal, then talk to Bestel in the Act 1 Town.
 - Deal with the Bandits - Kill all 3 Bandits in Act 2, or save 1 Bandit and kill the other 2 (based on your build guide)
- Victario's Secrets - Find the 3 Platinum Busts in the Sewers and deliver it to Hargan in Act 3 Town.
- Piety's Pets - Kill Piety in Act 3, and talk to Grigor in Act 3 Town.
- An Indomitable Spirit - Find the Spirit of Deshret in the Mines accessible from Act 4 Town.
- In Service to Science - Find Vilenta's
 MiasmeterMiasmeter"We shall peer at these cosmic wonderments as they
wake and writhe within that deep and nameless dark."
- Vilenta, 'Miasmeter: A Thesis' in The Control Blocks in Act 5 (not the The Control Blocks in Act 10), and return it to her at the Act 5 Town.
 - Kitava's Torments - Collect 3 Kitava's Torments from the The Reliquary in Act 5 (not the The Reliquary in Act 10), and deliver it to Lani at the Overseer's Tower (Act 3 town)
- The Father of War - WP to The Ridge (Act 6), go to The Karui Fortress, Kill Tukohama, Karui God of War, find the Karui Fortress Exit
- The Puppet Mistress - WP to The Riverways in Act 6 (not The Riverways in Act 2) go to The Wetlands, and then to Spawning Grounds, kill Ryslatha, the Puppet Mistress, and talk to Tarkleigh in Act 6 Town
- Queen of Despair - WP to the Northern Forest in Act 7 (not the Northern Forest in Act 2) and go to Dread Thicket, Kill Gruthkul, Mother of Despair in Act 7
- The Cloven One - WP to Prisoner's Gate in Act 6 (not the Prisoner's Gate in Act 1), go to Valley of the Fire Drinker (right), Kill Abberath, the Cloven One, and talk to Bestel in Act 6 Town
- The Master of a Million Faces - Kill Greust and Ralakesh, Master of a Million Faces in Act 7
- Kishara's Star - WP to The Causeway in Act 7, find
 Kishara's StarKishara's StarTo the wily Kishara's eye, a star brighter than the sun.
 close to the Waypoint, and deliver it to Weylam in Act 7 Town
 - Love is Dead - WP to The Grain Gate in Act 8, find The Quay entrance close to the Waypoint, find Ankh of Eternity, go to Resurrection Site, Kill Tolman, talk to Clarissa in Act 8 Town
- Reflection of Terror - WP to The Bath House, Kill Yugul, Reflection of Terror in Act 8, and talk to Hargan in Act 8 Town
- The Gemling Legion - Kill The Gemling Legion in Act 8 The Grain Gate, and talk to Maramoa in Act 8 Town
- Queen of the Sands - WP to The Vastiri Desert in Act 9, get the
 Storm BladeStorm BladeGarukhan sought madness and knowledge amongst the billowing clouds of a
blackened sky. A vulture of pride, she would not be refused, and so the
stratosphere divulged unto her eldritch secrets of its tumultuous past. , talk to Petarus and Vanja, go to The Vastiri Desert, go to The Oasis, Kill Shakari, talk to Irasha in Act 9 Town
 - The Ruler of Highgate - WP to The Quarry in Act 9, go to Shrine of the Winds, Kill Garukhan, Queen of the Winds, and talk to Irasha or Oyun in Act 9 Town
- Vilenta's Vengeance - Kill Vilenta in The Control Blocks in Act 10 (not the The Control Blocks in Act 5) and talk to Lani at Oriath Docks or Karui Shores
- An End to Hunger - Kill Kitava in Act 10, and talk to Lani at Oriath (in Epilogue) or Karui Shores
